

AI Ecommerce Poster Workflow: Product, Background, Typography and Mood
A reusable AI ecommerce poster workflow from product analysis and composition to background mood, typography space and final QA.
Table of Contents
An ecommerce poster must show the product, communicate the selling point, attract clicks and leave room for layout. The most reliable workflow is product, composition, background, typography space, then refinement.
Workflow Overview
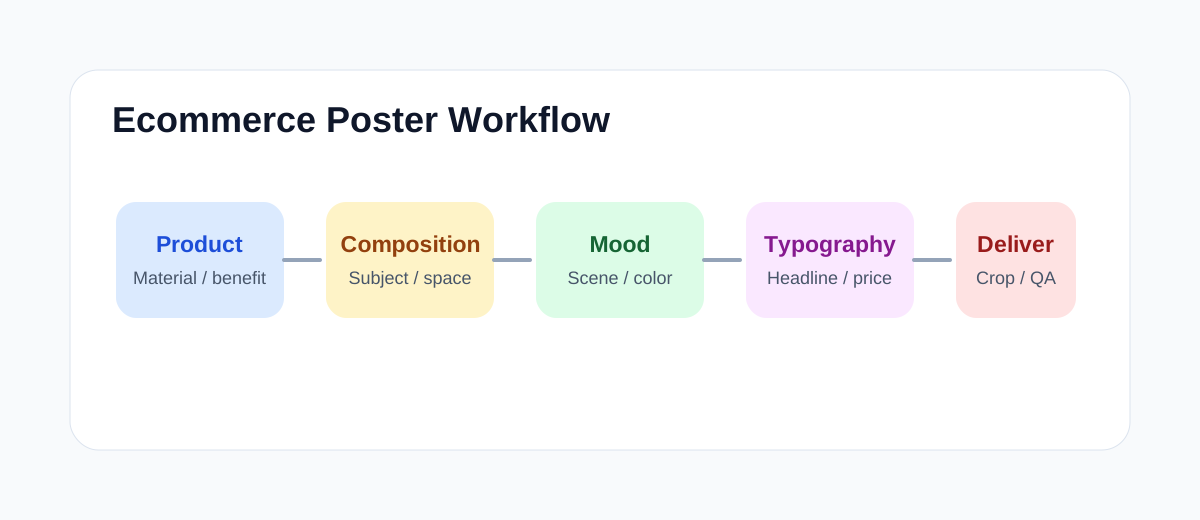
- Analyze the product.
- Choose composition.
- Build a background that supports the selling point.
- Reserve copy space.
- Refine details and crop.
Prepare Product Inputs
Prepare product appearance, selling points, platform ratio and brand tone before writing prompts. These inputs prevent random packaging changes.
Analyze the Product
Translate product facts into visual language: material, shape, use case, mood and key benefit.
Choose the Composition
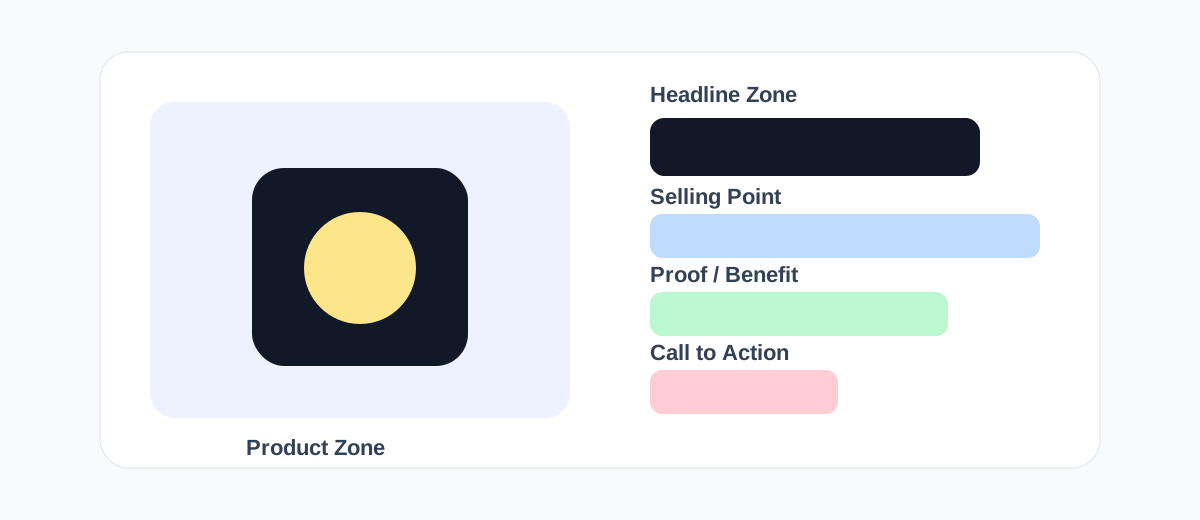
Use a centered hero, split layout, flat lay, or immersive usage scene depending on the placement.
Build Background and Mood
The background should explain the product benefit. Keep props minimal and avoid visual noise.
Reserve Typography Space
Generate the image without text first, then add real typography in a design tool.
Generate and Refine
First check direction, then tune product size, background complexity, props and shadows.
Full Templates
Create a [ratio] ecommerce poster for [product]. The product is [material/shape/color], placed [position], with realistic packaging and crisp edges. Background: [scene/material/color], mood: [fresh/premium/tech/warm]. Use [lighting], natural shadow and subtle reflection. Leave clean space at [area] for later copy. No text, no extra logos, no distorted product.Three Poster Case Types
Use a centered hero layout for launches, a split layout for promotions, and an immersive scene for lifestyle selling. Each type needs a different amount of copy space and background detail.
Post-Design Typography Tips
Add real typography after generation. Keep the headline short, limit selling points, and use overlays when the background is too busy.
Delivery Checklist
- Is the product clear at thumbnail size?
- Is the selling point visible within one second?
- Is there copy space?
- Does the mobile crop still work?
Frequently Asked Questions
How should I design the background of an AI ecommerce poster?
The background should support the selling point: clean space, a material scene or a mood scene all work, but keep props minimal and visuals clean so the product and copy stay prominent.
What should I do when AI poster text is garbled?
The safest approach is to forbid text during generation with negative prompts like “no text”, then add real typography later in Photoshop, Figma or similar tools.
How do I keep product images consistent with the brand?
Lock the product angle, color, material and key light, and reuse the same description across prompts. For batch work, image references or a fixed template are more reliable.
How many steps does a full AI ecommerce poster take?
The guide uses five steps: analyze the product, choose composition, build background and mood, reserve typography space, then generate and refine — finishing with a QA checklist for distortion, clarity and copy space.
Related Tutorials
How to Use Midjourney: Beginner Guide
Learn how to use Midjourney from signup to your first image, including prompts, personalization, variations, upscaling, remix, and image references.
Seedream Quick Start Guide
Learn ByteDance Seedream from scratch, master Seedream3.0/4.0/4.5 usage tips, quickly generate high-quality AI images
AI Art Prompt Engineering Guide
Master AI art prompt writing techniques from beginner to advanced, including universal formulas, weight syntax, style keyword library and practical templates